![Hexatronic_Group_avatar_RGB.png]](https://knowledge.hexatronic.com/hs-fs/hubfs/Hexatronic_Group_avatar_RGB.png?width=40&height=40&name=Hexatronic_Group_avatar_RGB.png)
Build a simple active InOne network in the InOne Design Tool. You add one redundant power supply (HDN), connect one access node (HAN), and duplicate it to make a chain of three.
Please note: the InOne Design Tool is tested in Google Chrome and Mozilla Firefox. Your design is stored only in your browser. Hexatronic cannot access or store it, so export the design file before you close the browser.
Before you begin
- Open inone-design.com and click Continue in the welcome dialog.
- Know the PSU model, the cable route and the power each HAN needs. If you are not sure, use the product guide (the blue (i) icon next to each field).
Add the power supply (HDN)
- Right-click an empty area of the canvas, then click Add HDN.

- In the Add power supply dialog, make sure Active system is selected.
- Click the PSU model (active) dropdown menu and select a model: PSU-110V-480W (110 V) or PSU-110V-1000W (110 V).
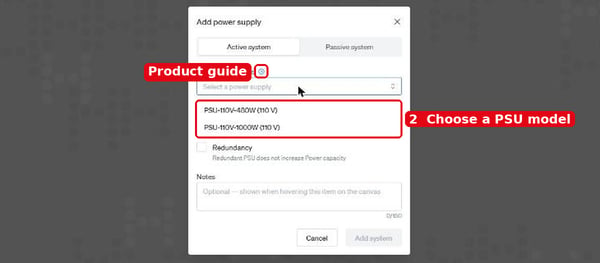
- Enter the HDN details:
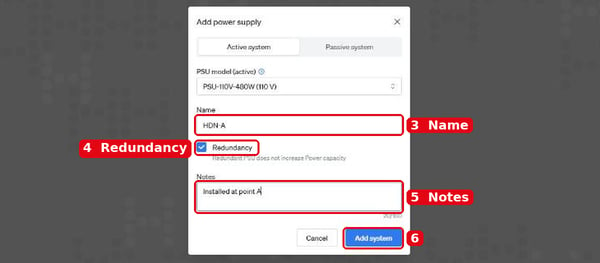
- Name: enter a name, for example HDN-A.
- Redundancy: select the checkbox to add a redundant PSU. A redundant PSU does not increase the power capacity.
- Notes: optionally enter a note, for example Installed at point A. Notes show when you hover over the item on the canvas.
- Click Add system.
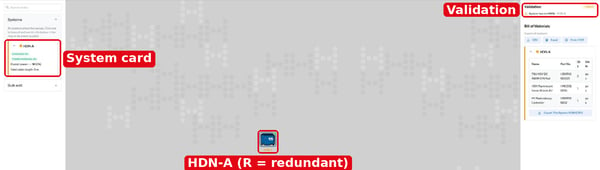
- The HDN appears on the canvas. A green R badge means it is redundant. The Validation panel shows System has no HANs until you connect a HAN.
- To move the HDN, click and drag it on the canvas.
Connect a HAN
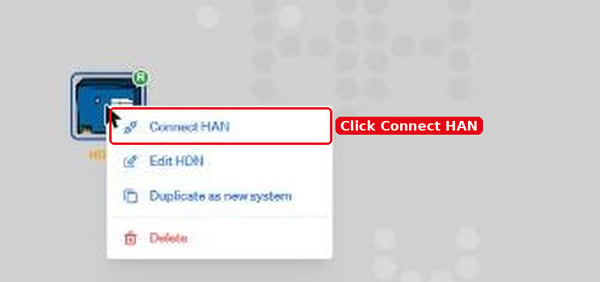
- Right-click the HDN, then click Connect HAN.
- In the Connect access node (HAN) dialog, enter the details:
- Node name: enter a name, for example A1.
- HAN output power (active): select 48VDC+ / 150W, 48VDC+ / 300W & 24VDC+ / 30W or 24VDC+ / 150W.
- Form factor: select the cabinet size: E3, E10 or E10s.
- Cable type: select the cable, for example Blowable/Ducted.
- Size: select the copper size and fiber count: 1.5 mm2 (12 Fibers), 3 mm2 (24 Fibers) or 6 mm2 (24 Fibers).
- Cable length (m): enter the length, for example 200.
- Power (W): enter the total power of the equipment at the HAN, for example 75.
- VDC output Boost: leave selected to raise the output voltage by 10%.
- Notes: optionally list the loads, for example Industrial switch 10 W, cameras 65 W.
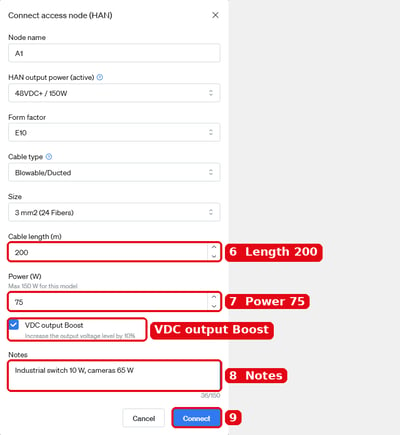
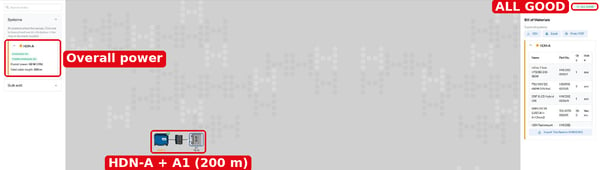
- Click Connect. The HAN appears on the canvas and the Validation panel shows ALL GOOD.
Duplicate the HAN
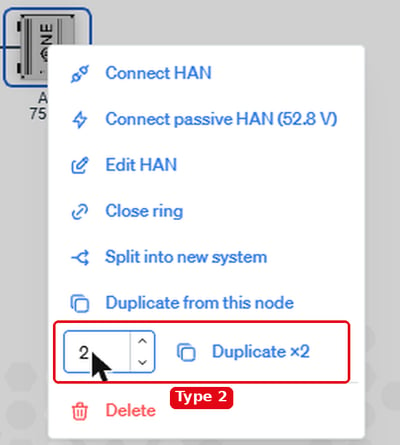
- Right-click the HAN.
- In the number field next to Duplicate, enter the number of copies, for example 2.
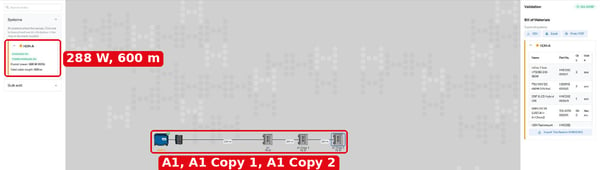
- Click Duplicate ×2. The copies are added after the HAN with the same settings.
Check the design
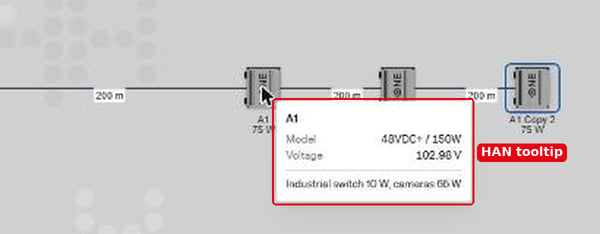
- Hover over a HAN to see its name, model, input voltage at the cabinet and note. The HAN regulates the output to 48 V or 53 V.
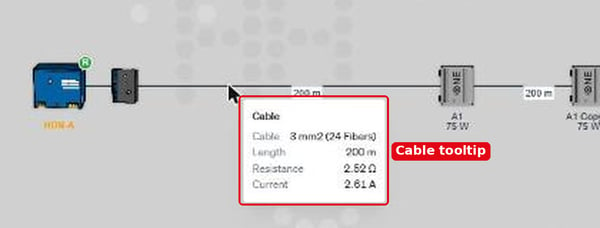
- Hover over a cable to see the cable type, length, resistance and current.
Save your work
- Click Export in the top bar, or right-click a free space on the canvas, to export the configuration and design file.
- Download the Bill of Materials as CSV, Excel or Print / PDF.
- Keep a screenshot of the design together with the exported configuration file.
Please note: for designs at the upper limits of the system, consult an InOne certified consultant.